How to Make a Baby Handprint with Salt Dough (Step by Step)
A salt dough baby handprint is the classic keepsake for a reason: it costs almost nothing, uses three things you already have in the kitchen, and captures your baby's tiny hand or foot in a way you'll treasure for years. This step-by-step tutorial walks you through the exact recipe, how to press a clean print, the right way to dry or bake it, and the sealing step that makes it last instead of crumbling.
This is a beginner-friendly project. You do not need any special skill, just a calm baby and about 20 minutes of hands-on time. Let's make one together.
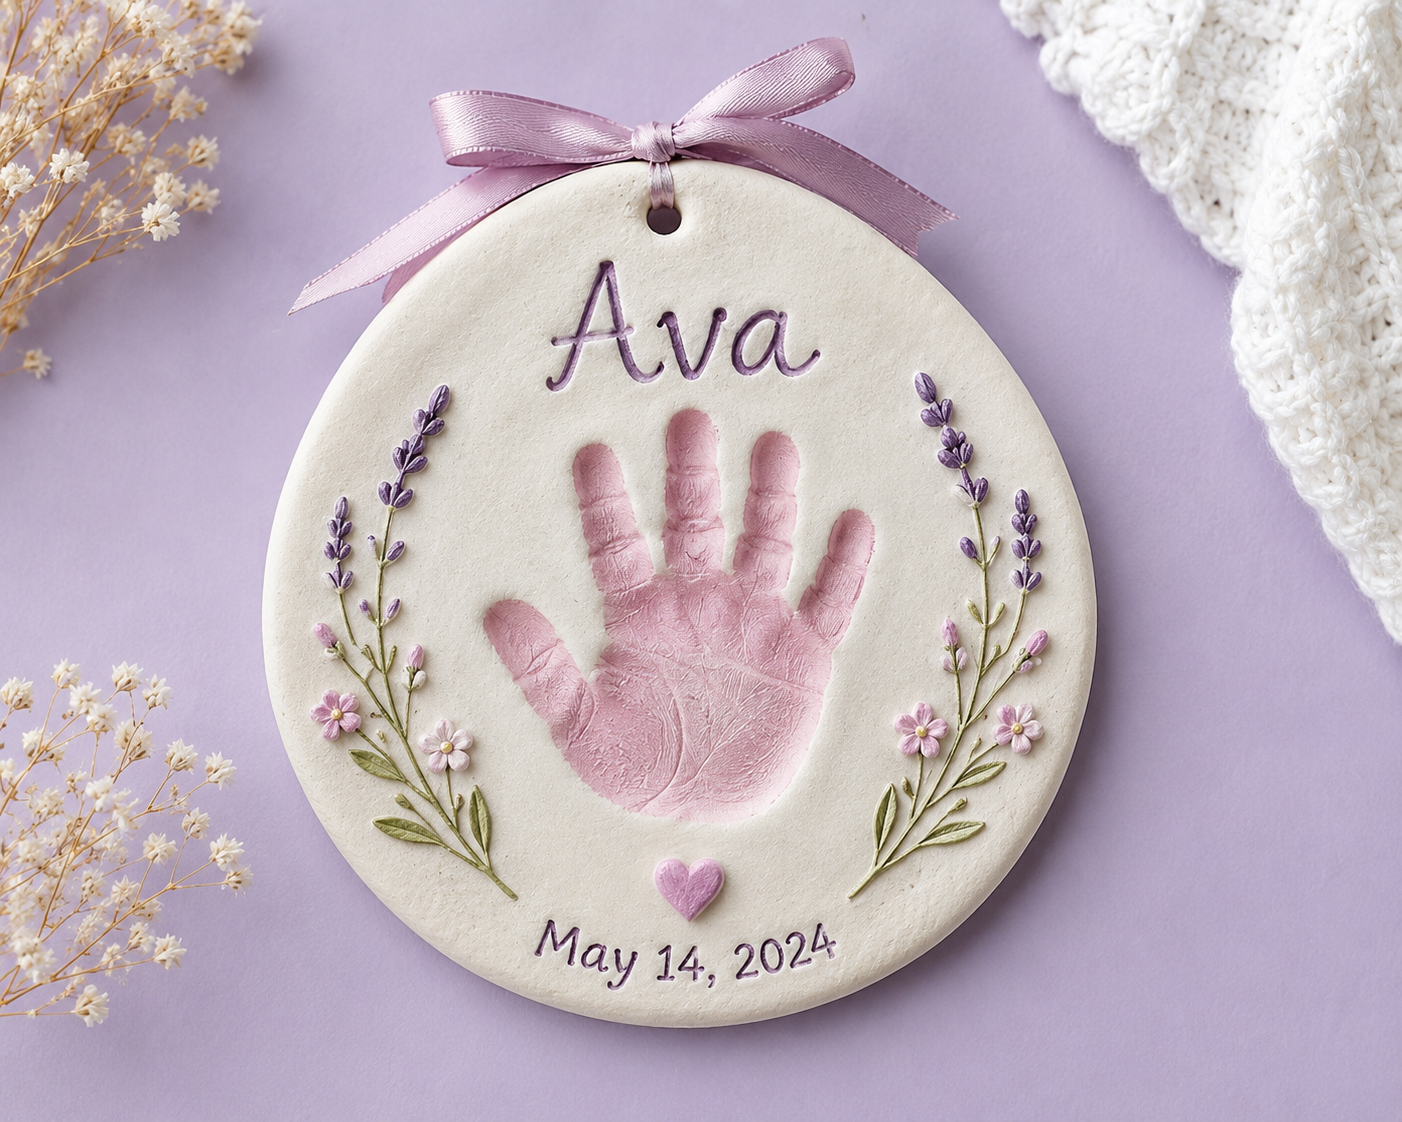
What You'll Need
Ingredients
- 1 cup all-purpose flour
- 1 cup fine salt
- About ½ cup water (add gradually)
Tools
- Mixing bowl and spoon
- Rolling pin (or a smooth bottle)
- Parchment paper and a baking tray
- A round lid or cookie cutter to shape
- A drinking straw (to make a hanging hole)
- Non-toxic paint, a brush, and clear varnish or sealant for finishing
For paint and varnish, choose products labeled non-toxic. In the U.S., art materials carrying the AP seal from the Art & Creative Materials Institute have been evaluated as non-toxic, which is exactly what you want for anything near your baby.
The Salt Dough Recipe
Mix the flour and salt in a bowl, then add the water a little at a time, stirring as you go, until a smooth dough forms that is not sticky. If it feels too wet, add a pinch more flour; if too dry and crumbly, add a few drops of water. Knead it for a minute until it is even and pliable. That is the whole recipe.
Step-by-Step: Making the Handprint
- Roll out the dough. On parchment, roll the dough to about ¼-inch (roughly 1 cm) thick. Too thin and it cracks, too thick and it takes longer to dry.
- Time it right. Make your print when your baby is calm and full, just after a feed and before a nap. A content baby relaxes their hand far more easily.
- Press the hand or foot. Gently but firmly press your baby's hand or foot straight down into the dough to leave a clear, deep impression, then lift straight up without dragging. For hands, stroking the back of the hand helps the fingers open.
- Shape it. Use a round lid or cutter to trim a neat circle (or any shape you like) around the print.
- Add a hanging hole. If you want to hang it, press a drinking straw near the top edge to punch a clean hole.
Do not expect a flawless print on the first try. Keep a second piece of dough ready, and remember that even a slightly imperfect print is the print of your baby, which is the whole point. For more print-day technique and how to avoid the usual slip-ups, the full baby handprint keepsakes guide has you covered.
Drying or Baking the Dough
You have two options to harden the dough:
- Air-dry: leave it flat in a dry spot for 24 to 48 hours, turning it once so both sides dry evenly. This is the gentlest method and avoids any browning.
- Bake low and slow: place it on a parchment-lined tray and bake at a very low temperature, around 200°F (about 90°C), for a few hours until fully hardened. Low and slow is the key, since high heat causes cracking and browning.
Whichever you choose, make sure the dough is completely dry all the way through before decorating. A piece that still feels cool or soft in the center needs more time.
Decorating and Personalizing
Once it is fully cool and dry, the fun begins. Paint the surface in your chosen colors, leave the print itself a contrasting shade so it stands out, and add your baby's name and the date. A fine brush or a paint pen works well for lettering. Keep it simple: a single background color with a clean print and neat text looks timeless. Let the paint dry completely before the final, most important step.
Sealing It So It Lasts
This step is non-negotiable. Unsealed salt dough absorbs moisture from the air and will eventually crumble. Once your paint is dry, apply several thin coats of clear varnish or a waterproof sealant, letting each coat dry before the next. Seal the back and edges too, not just the front. Properly sealed, a salt dough keepsake can last for many years.
Troubleshooting Common Problems
- Cracking: usually from rolling too thin or drying too fast. Roll thicker and dry low and slow.
- Browning: the oven was too hot. Use the lowest setting and more time.
- Blurry print: the hand dragged or the dough was too soft. Press straight down and lift cleanly.
- Crumbling later: it was not sealed. Always finish with varnish.
Display and Gift Ideas
Once your keepsake is sealed, show it off. A salt dough print looks lovely propped on a nursery shelf, hung from a ribbon through the straw hole, or set into a simple frame or shadow box. Many families make one print each year and line them up to watch how much those little hands have grown. A finished print also makes a heartfelt, almost-free gift, especially for grandparents, who treasure these more than almost anything store-bought. For framing and long-term care, see our guide on how to preserve and frame baby handprints, turn it into a first Christmas ornament, or browse handprint gift ideas for grandparents.
Other Ways to Capture the Print
Salt dough is wonderful, but it is not your only option. If you would rather skip the dough, an inkless kit gives a clean, mess-free print, covered in our guide to no-mess ink handprints. Ready-made kits in clay or ink can also be quicker; see our best baby handprint kits roundup, and our clay vs ink handprint kits comparison to decide which suits you.
Frequently Asked Questions
How long does a salt dough handprint take to dry?
Air-drying takes about 24 to 48 hours, turning once. Baking at a very low temperature (around 200°F) takes a few hours. Make sure it is hard all the way through before decorating.
Why did my salt dough handprint crack?
Cracking usually comes from rolling the dough too thin or drying it too quickly. Roll to about a quarter inch, and dry slowly, either air-dried or baked low and slow.
Is salt dough safe for my baby?
It is safe to handle with supervision, but it is not edible. The salt content can be harmful if mouthed in quantity, so keep it out of reach and watch closely while you work.
How do I keep my salt dough keepsake from crumbling?
Seal it. After the paint dries, apply several thin coats of clear varnish to the front, back, and edges. Sealing blocks moisture and is what makes the keepsake last for years.
What is the best age to take a baby's handprint?
Footprints are easy from birth, while clean handprints are usually easier after 4 to 6 months once the grasp reflex fades. Either way, work when your baby is calm and full.
Salt dough is the easiest, most budget-friendly way to capture this fleeting stage, and with the sealing step done right, your keepsake will still look lovely years from now. For more keepsake methods, display ideas, and gift inspiration, head back to our complete baby handprint keepsakes guide.